Introduction
In this blogpost we want to demonstrate how you can use nephio to manage deployments that span across multiple clusters.
We are going to create three git repositories and three k8s clusters in total. Their purposes are as follows:
- nephio-master git repository: In this repository we are storing the deployment of the nephio master server
- nephio edge-1 & edge-2 git repository: In this repository we store the desired configurations of our applications which should be deployed on the edge cluster
- nephio-master cluster: In this cluster the core nephio components reside. The cluster acts as a management cluster for the edge clusters
- edge-cluster 1 & 2: In these clusters we want to deploy our workload

What we want to achieve
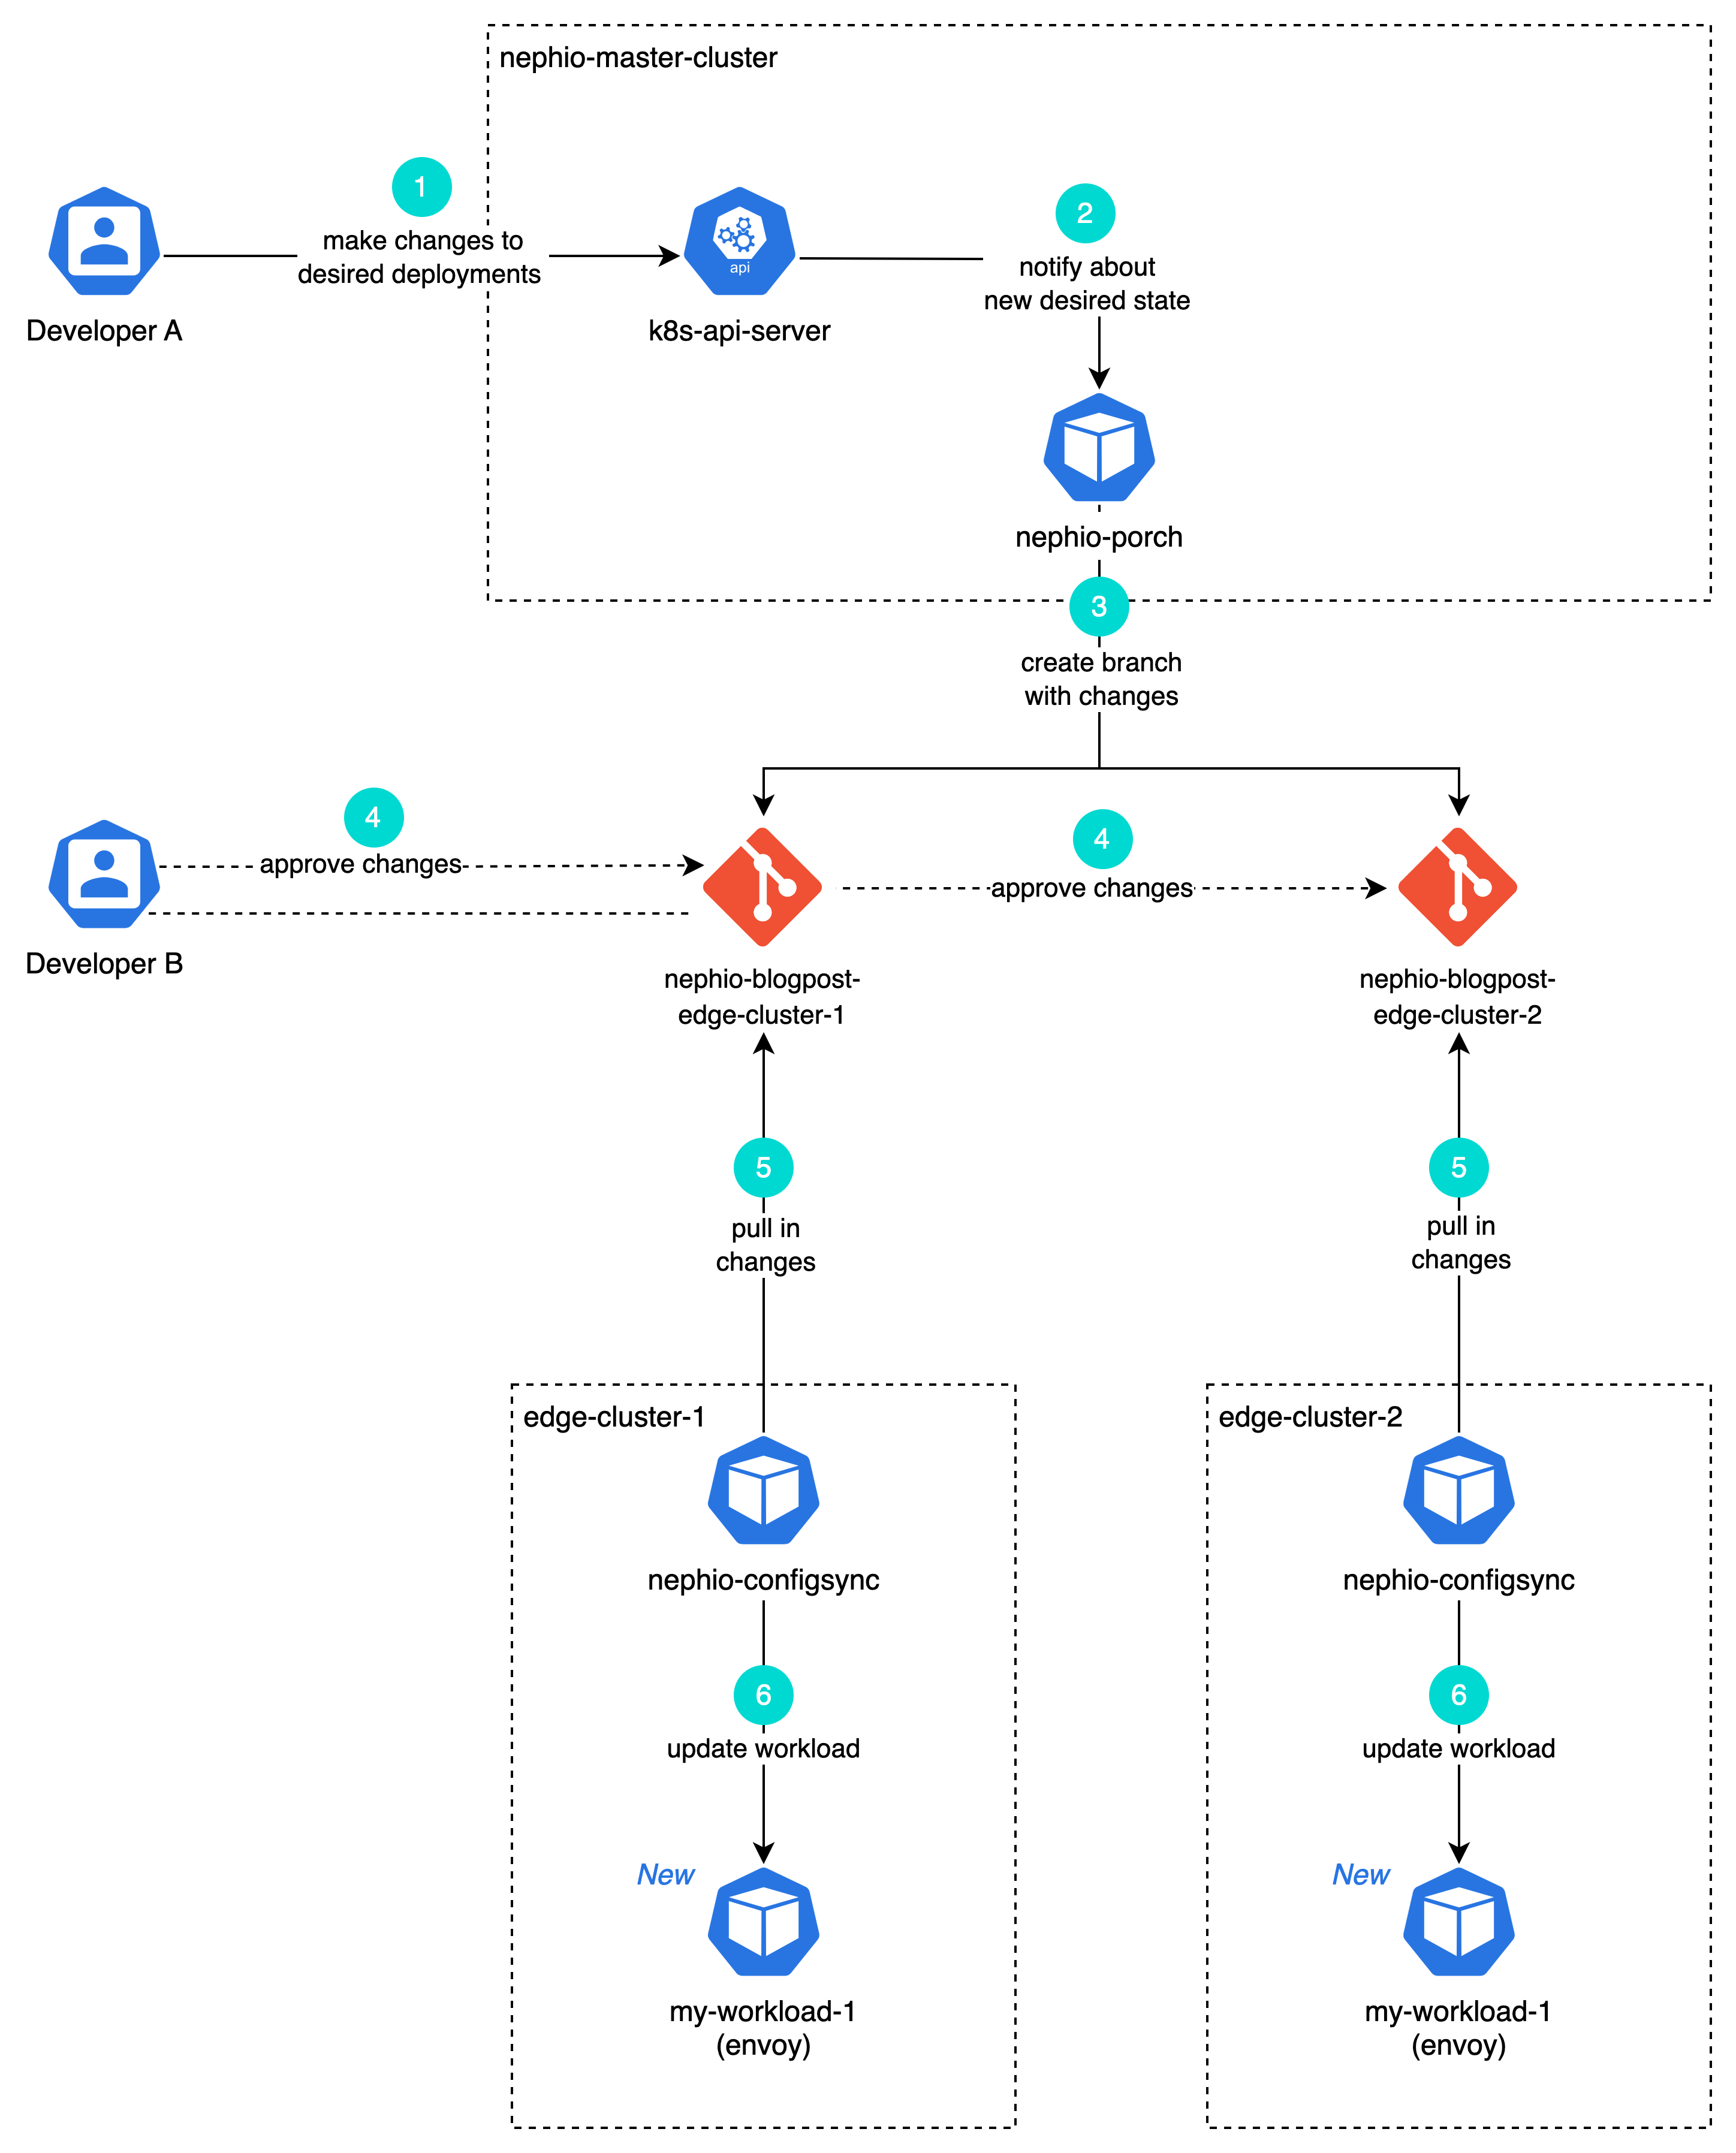
Using this architecture we can enable the following flow for our applications:
- Developer A creates the new desired workload configuration
- The porch component creates new branches in the corresponding git repositories for the edge-clusters for the changes
- Developer B approves the changes
- The configsync components in the edge-clusters update their corresponding App
Set-Up
Setting up the git repositories
Nephio works with different repositories and supports multiple mechanisms for authentication. For the simplicity of this talk we’ll be using public repositories hosted on github: You can find our examples under nephio-blogpost-master-cluster, nephio-blogpost-edge-1, and nephio-blogpost-edge-2. If you plan on using nephio’s config-sync component with private repositories and authentication, please refer to the official config-sync documentation.
In your preferred git provider, create three repositories: nephio-master-cluster, nephio-edge-1, nephio-edge-2
Cluster Setup and Sizing
We start by creating the three clusters we are going to use. For the purpose of this demo, we recommend sizing the master cluster to 4 vCPU and 8GB RAM in total and each edge-cluster to 2 vCPU and 4GB RAM.
If you are using KKP, it will look similar to this:

Installing nephio on the master-cluster
Nephio is being installed using kpt. Kpt is a Kubernetes package and configuration management tool. It allows you to combine related Kubernetes manifests into a package and re-use them. Kpt is also used by nephio itself in order to deploy workload into the edge-clusters. At the time of writing, you will need one of the beta versions of kpt. Throughout this blogpost we are using the v1.0.0-beta.37 release of kpt.
Once you have kpt installed, we can move to the installation of nephio.
Installing a package in kpt usually involves the following four steps:
Downloading a copy of the kpt package into your git repository
# inside nephio-master git repository
kpt pkg get https://github.com/nephio-project/nephio-packages.git/nephio-system@v1.0.1

# you can check that this creates a local copy of the full package inside your repository
tree
Applying any customizations to the local copy
# In our case, we need an updated version of porch, but we also want a CRD, so we need to do the following
cd nephio-system
kpt pkg get https://github.com/nephio-project/nephio-example-packages/porch-dev
cp porch/config-management-operator.yaml porch-dev
rm -rf porch
cd ..
Initializing the package to be used with your cluster
# with KUBECONFIG pointing to the nephio-master-cluster
kpt live init nephio-system

# this is going to create a resourcegroup.yaml file, which acts as our inventory
less nephio-system/resourcegroup.yaml
Deploying the package to your cluster
# with KUBECONFIG pointing to the nephio-master-cluster
kpt live apply nephio-system --reconcile-timeout=15m
After successful installation of nephio-system, we repeat the process for the nephio-webui package:
# inside nephio-master git repository
kpt pkg get https://github.com/nephio-project/nephio-packages.git/nephio-webui@v1.0.1

# with KUBECONFIG pointing to the nephio-master-cluster
kpt live init nephio-webui
kpt live apply nephio-webui --reconcile-timeout=5m
Afterwards we can port-forward to the nephio-webui using.
kubectl -n nephio-webui port-forward svc/nephio-webui 7007:7007
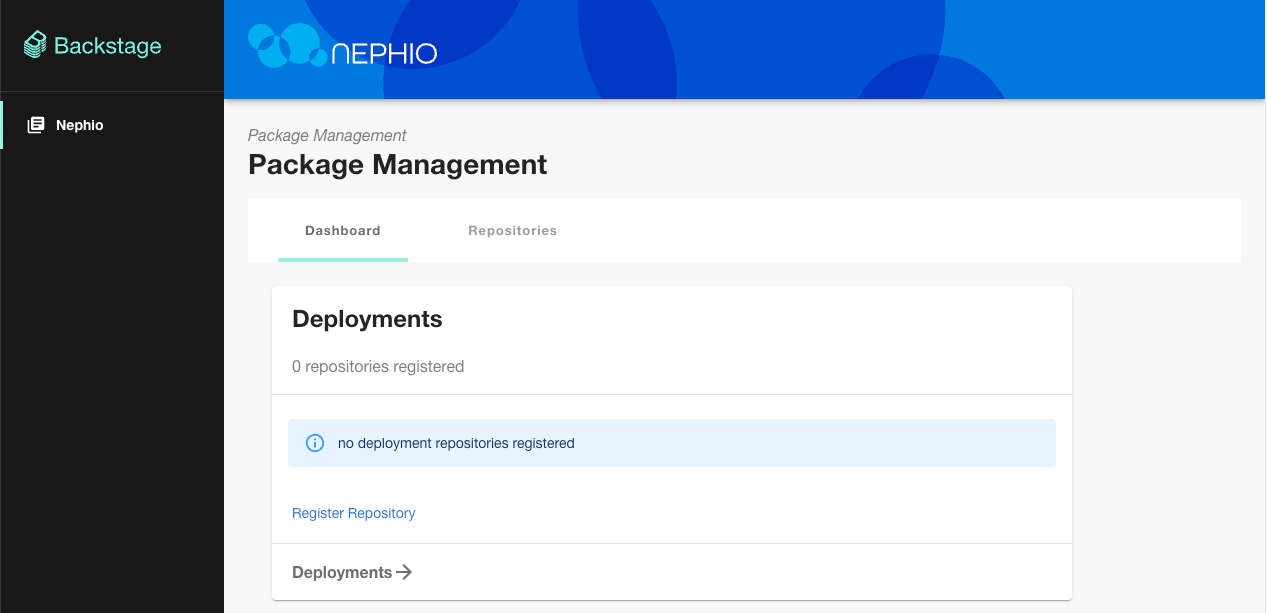
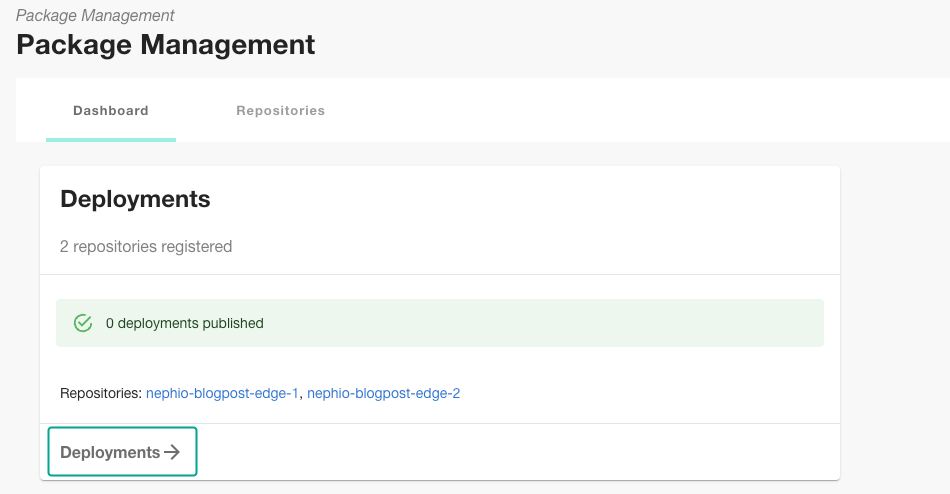
Now if you go to localhost:7007 on your machine, you should be able to see a UI similar to this:
Adding our package repository to nephio
In order for a package to be deployed using nephio, its repository needs to be registered. For this demo, we have prepared a repo, which contains an envoy kpt package. You need to register it with your nephio installation using:
# with KUBECONFIG pointing to the nephio-master-cluster
kpt alpha repo register \
  --namespace default \
  --deployment=false \
  https://github.com/SimonTheLeg/nephio-example-packages.git
Configuring nephio-master to edit edge-cluster repositories
In order for the nephio-master to make changes to your edge-cluster repositories, it needs write permissions. In the case of Github, a personal access token with the repo scope is required. For additional authentication options for other git providers, please check the kpt repository registration guide. This time we want to create our repository with the --deployment flag set to true to indicate to nephio that this repository is being used to track deployments:
GITHUB_USERNAME=<your github username>
GITHUB_TOKEN=<GitHub Personal Access Token>

kpt alpha repo register \
  --namespace default \
  --repo-basic-username=${GITHUB_USERNAME} \
  --repo-basic-password=${GITHUB_TOKEN} \
  --create-branch=true \
  --deployment=true \
  <http url of your edge cluster-1 repo here>

# and then we do the same for the edge-cluster-2 repo
kpt alpha repo register \
  --namespace default \
  --repo-basic-username=${GITHUB_USERNAME} \
  --repo-basic-password=${GITHUB_TOKEN} \
  --create-branch=true \
  --deployment=true \
  <http url of your edge cluster-2 repo here>
Using the kpt cli has the advantage that it automatically creates all required secrets. Of course it is also possible to create the Repository CR and required secrets manually. In order to do so, please check out the official kpt example.
You should now have in total three repositories
kubectl get repository

# should return something similar to
NAME                      TYPE   CONTENT   DEPLOYMENT   READY   ADDRESS
nephio-blogpost-edge-1    git    Package   true         True    https://github.com/SimonTheLeg/nephio-blogpost-edge-1.git
nephio-blogpost-edge-2    git    Package   true         True    https://github.com/SimonTheLeg/nephio-blogpost-edge-2.git
nephio-example-packages   git    Package                True    https://github.com/SimonTheLeg/nephio-example-packages.git
Setting up config-sync in our edge-clusters
Config-sync is the last component we will need to set-up. Config-sync runs inside an edge cluster and watches the corresponding git-repository for changes. After it has detected a change in its git repository, it automatically rolls out the change to its cluster. Since it is deployed in the edge cluster, we need to deploy a separate config-sync for each one. Once again we can use kpt to do so:
# inside the edge-clusters-1 git repository
kpt pkg get https://github.com/nephio-project/nephio-packages.git/nephio-configsync@v1.0.1
This time, we need to make a modification, to point config-sync to our repository. In your favorite editor, edit nephio-configsync/rootsync.yaml and replace the spec.git.repo field to point to your edge-1 repository.
--- a/nephio-configsync/rootsync.yaml
+++ b/nephio-configsync/rootsync.yaml
@@ -9,6 +9,7 @@ metadata: # kpt-merge: config-management-system/nephio-workload-cluster-sync
 spec:
   sourceFormat: unstructured
   git:
-    repo: https://github.com/nephio-test/test-edge-01
+    repo: << url of your edge-1 repo >>
     branch: main
     auth: none
Afterwards deploy the package into the edge-1 cluster.
# with KUBECONFIG pointing to the edge-1-cluster
kpt live init nephio-configsync
kpt live apply nephio-configsync --reconcile-timeout=5m
Now we need to repeat the same process for the edge-2:
# inside the edge-clusters-2 git repository
kpt pkg get https://github.com/nephio-project/nephio-packages.git/nephio-configsync@v1.0.1
This time, make sure spec.git.dir is pointing to the edge-2 url:
--- a/nephio-configsync/rootsync.yaml
+++ b/nephio-configsync/rootsync.yaml
@@ -9,6 +9,7 @@ metadata: # kpt-merge: config-management-system/nephio-workload-cluster-sync
 spec:
   sourceFormat: unstructured
   git:
-    repo: https://github.com/nephio-test/test-edge-01
+    repo: << url of your edge-2 repo >>
     branch: main
     auth: none
# with KUBECONFIG pointing to the edge-2-cluster
kpt live init nephio-configsync
kpt live apply nephio-configsync --reconcile-timeout=5m
Deploying our package to the edge clusters
As a demo, we will first deploy the package manually via the UI. This is a great way to show a typical flow and what happens behind the scenes. Afterwards we will be looking into a GitOps-friendly and multi-cluster way. This is going to use the PackageVariantSet CR.
1) Using the UI
Go to Deployments
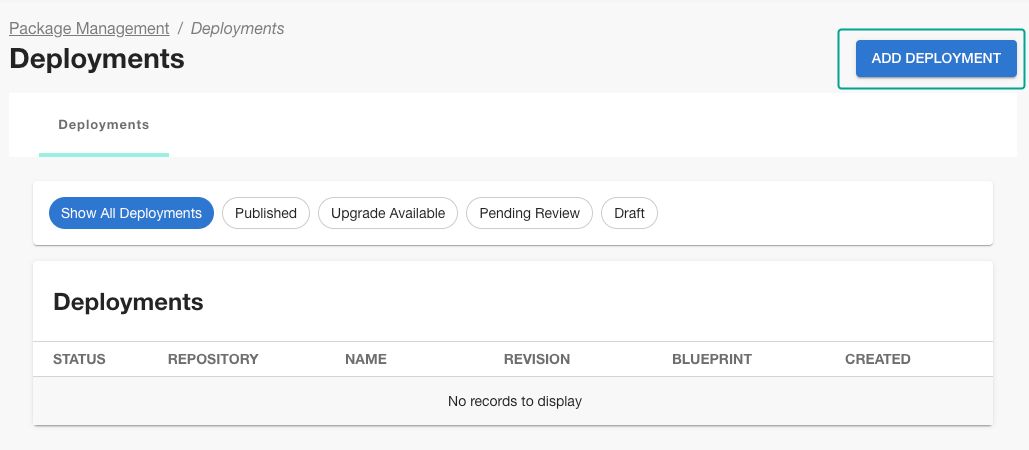
Then to Add Deployment
Now we are going to select Create a new deployment by cloning a team blueprint. This means that we are going to take the envoy package from our example packages and make a copy of it into our deployment repository. Additionally select envoy from the Team Blueprint to Clone, which is the package we want to deploy.
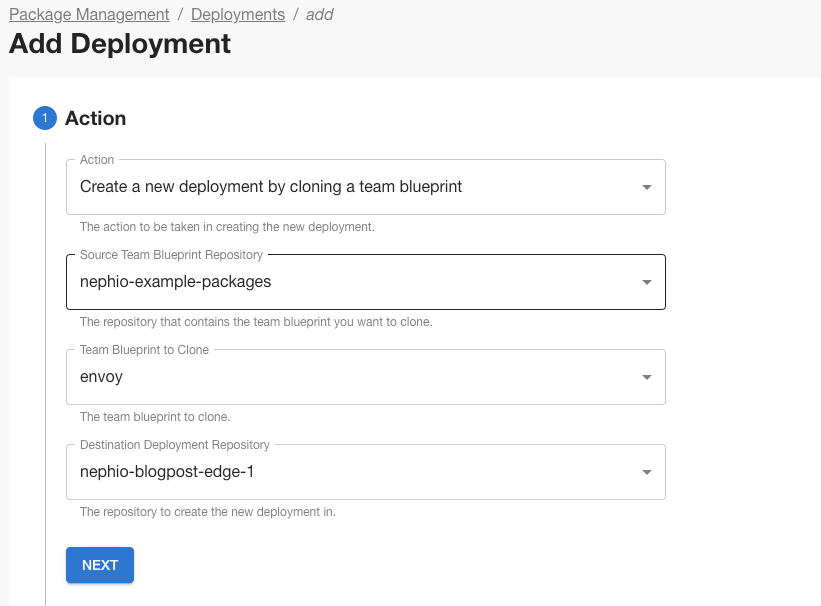
You can leave the remaining steps unchanged and click on Create Deployment

Now what is happening behind the scenes is that nephio is going to create a branch in your edge-clusters repository in order to draft the deployment.

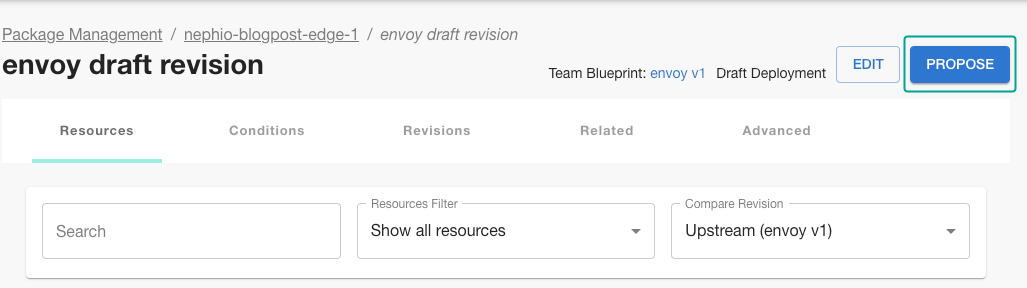
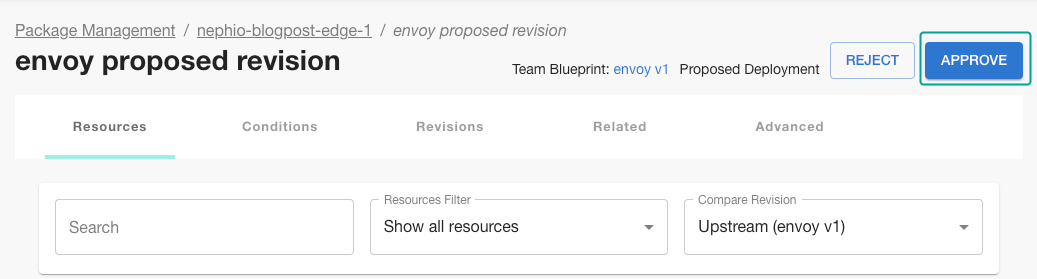
Afterwards click the Propose button in nephio to advance your draft to a proposal
You will see that nephio now has created a new branch reflecting the proposal state of your change.

For the purpose of this demo, approve your change. Of course, in a real-world scenario, the approval would be conducted by another developer.
You can see that your changes have been merged into the main branch.
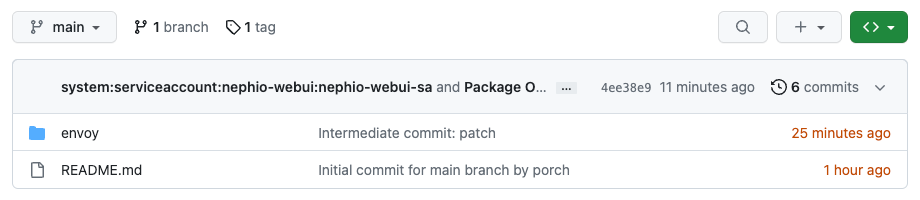
This is going to trigger configsync, which now proceeds to roll-out envoy to the edge-cluster.
# with KUBECONFIG pointing to the edge-1-cluster
kubectl get pods -n envoy

NAME                     READY   STATUS    RESTARTS   AGE
envoy-6867886d66-mnzdm   1/1     Running   0          28s
Cleaning Up
At the time of writing, it is not possible to do the full deletion inside the UI. Therefore we have to manually search for the revision and trigger the deletion-proposal workflow:
# with KUBECONFIG pointing to the nephio-master
kubectl get packagerevision --field-selector spec.packageName=envoy,spec.revision=v1,spec.repository=<name of your repository for edge-1>

# this should return a single PackageRevision, similar to this
NAME                                                              PACKAGE   WORKSPACENAME   REVISION   LATEST   LIFECYCLE   REPOSITORY
nephio-blogpost-edge-1-1f1198bc626ef5f157fbfd8ea21e1e6ae471611f   envoy     v1              v1         true     Published   nephio-blogpost-edge-1

# Now we are going to set spec.lifecycle to DeletionProposed
kpt alpha rpkg propose-delete <name of your Packagerevision> --namespace=default

# Now we can delete the PackageRevision
kpt alpha rpkg del <name of your Packagerevision> --namespace=default

# For now we need to manually delete the folder inside edge-1 repository
git rm -rf envoy
git commit -m "cleanup envoy"
git push
2) Using PackavariantSets - a GitOps approach
While the UI is great to demonstrate nephio’s regular deployment flow, it can become tedious when working with multiple edge clusters. This is where the PackageVariantSet comes in. A PackageVariantSet can be used to fan-out a deployment to multiple clusters.
Inside the nephio-master git repository, create a file called edge-clusters-packagevariantset.yaml with the following contents:
# inside nephio-master git repository
apiVersion: config.porch.kpt.dev/v1alpha2
kind: PackageVariantSet
metadata:
  namespace: default
  name: edge-clusters
spec:
  upstream:
    repo: nephio-example-packages
    package: envoy
    revision: v1
  targets:
  - repositories:
    - name: <name of edge cluster 1 repository>
    - name: <name of edge cluster 2 repository>
Apply it to the nephio-master cluster:
# with KUBECONFIG pointing to the nephio-master
kubectl apply -f edge-clusters-packagevariantset.yaml
Now you should see how a draft branch has been created inside each of your edge-cluster repositories.


From there on you can follow the regular approval flow from the previous section to roll-out your changes.
Outlook
This was a simple demo to illustrate the concepts behind nephio and illustrate its capacities. It can be extended to more complex interconnected workloads. In fact, nephio is designed to accommodate complex workloads like 5G core deployments. For a full example which deploys free5GC using nephio, please refer to the official nephio user-guide.
Additionally, this blogpost largely focuses on a strict 4-eye principle for every package. With additional git-automation, it is possible to streamline the process for large installations.